
Building your own computer can seem like a daunting task reserved for tech wizards. However, with a bit of guidance and patience, anyone can assemble a custom PC. The process is similar to building with high-tech LEGOs. The rewards are significant: a machine perfectly tailored to your needs, superior performance for your money, and a deep understanding of the technology you use every day.
This guide will walk you through the entire process, from selecting components to booting up your new system. We will cover the essential parts you need, provide a detailed assembly walkthrough, and offer tips for troubleshooting common issues. By the end, you’ll have the confidence and knowledge to build a powerful, personalized computer.
Why Build a Custom PC?
Before we dive into the “how,” let’s explore the “why.” Pre-built computers from major brands offer convenience, but they often come with compromises. Building your own PC puts you in complete control.
- Cost Efficiency: You can often build a more powerful PC for the same price as a pre-built one. By selecting each component yourself, you avoid the markups manufacturers add for assembly and branding. You can also hunt for sales and deals on individual parts.
- Total Customization: Whether you’re a gamer needing a top-tier graphics card, a video editor requiring massive amounts of RAM, or a writer who just wants a silent, reliable machine, you can choose parts that match your exact use case. You also get to pick the case, lighting, and cooling to match your personal aesthetic.
- Future-Proofing and Upgradability: When you build your own PC, you know exactly what’s inside. This makes upgrading individual components—like the graphics card or storage—incredibly simple down the road. You can extend the life of your computer for years, keeping it relevant without having to buy a whole new system.
- No Bloatware: Pre-built PCs often come loaded with unwanted software trials and applications that slow down your system from day one. A custom build starts with a clean slate, ensuring optimal performance right out of the box.
The Essential Components Checklist
Every PC is built from a core set of components. Understanding what each part does is the first step to making informed choices. Here are the essential parts you’ll need to gather.
- Central Processing Unit (CPU): The brain of your computer. It performs the calculations and executes the instructions that make your computer run. The two main manufacturers are Intel and AMD.
- Motherboard: The central nervous system. All your components plug into the motherboard, which allows them to communicate with each other. It’s crucial to ensure your motherboard is compatible with your chosen CPU (e.g., an AMD CPU needs a motherboard with an AMD socket).
- Graphics Processing Unit (GPU): Also known as a video card, the GPU is responsible for rendering images, video, and animations and displaying them on your monitor. This is arguably the most important component for gaming and creative work like video editing or 3D modeling.
- Memory (RAM): Random Access Memory is your PC’s short-term memory. It temporarily stores data that your computer is actively using, allowing for quick access. For most users, 16GB is a great starting point, while gamers and power users might opt for 32GB or more.
- Storage (SSD/HDD): This is your PC’s long-term memory, where your operating system, applications, and files are stored.
-
- Solid-State Drive (SSD): Uses flash memory for fast boot times and quick application loading. It’s highly recommended to have at least one SSD for your operating system.
- Hard Disk Drive (HDD): Traditional spinning-platter storage that offers more capacity for a lower price. It’s great for storing large files like movies or game libraries.
- Power Supply Unit (PSU): The PSU takes power from your wall outlet and converts it into usable energy for all your components. It’s important to get a PSU with enough wattage to power your system, with some headroom for future upgrades.
- Case: The chassis that houses and protects all your components. Cases come in various sizes (e.g., full-tower, mid-tower) and styles, affecting airflow and component compatibility.
You will also need a Phillips-head screwdriver, zip ties for cable management, and an anti-static wrist strap to protect your components from static electricity.
Step-by-Step Assembly Instructions
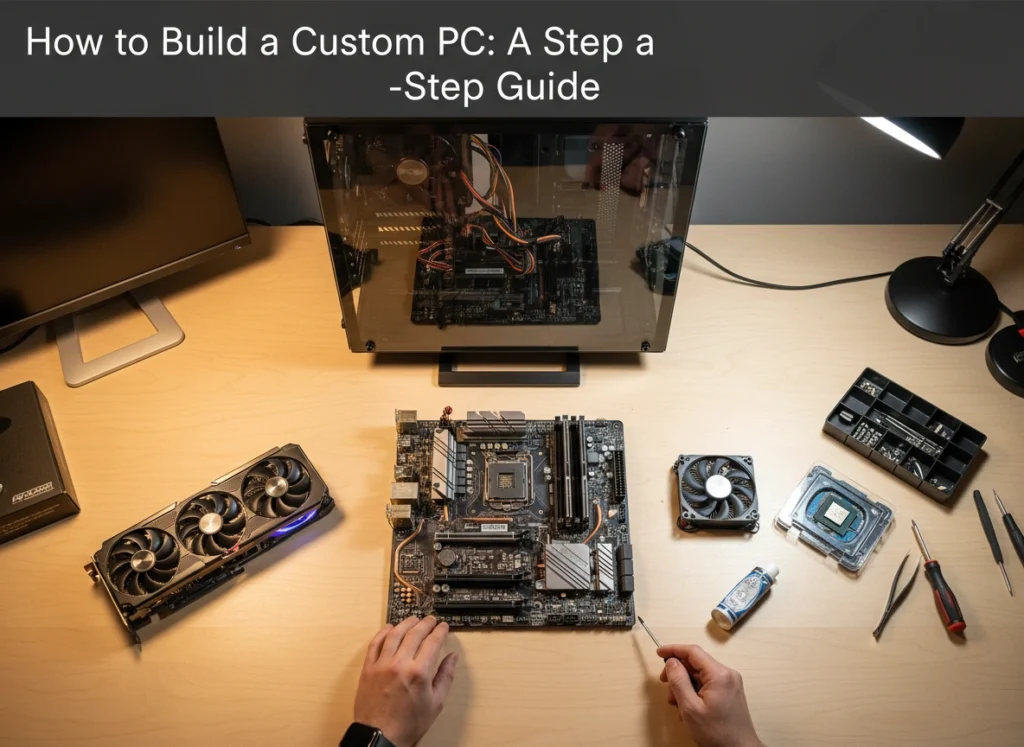
With all your components gathered, it’s time to start building. Prepare a large, clean, and well-lit workspace. Keep your component manuals handy, as they provide specific details for your parts.
Step 1: Prepare the Motherboard
Start by placing the motherboard on top of its anti-static bag on a flat surface.
- Install the CPU: Open the CPU socket lever on the motherboard. Align the small triangle on the corner of the CPU with the corresponding triangle on the socket. Gently place the CPU into the socket—do not force it. Once it’s seated, lower the retention lever to lock it in place.
- Install the RAM: Open the clips on the RAM slots. Align the notch on the bottom of the RAM stick with the notch in the slot. Press down firmly on both ends of the stick until the clips snap into place, securing the RAM.
- Install the M.2 SSD (if you have one): Locate the M.2 slot on your motherboard. Unscrew the standoff, insert the M.2 drive at an angle, and then press it down. Secure it with the small screw you removed.
Step 2: Prepare the Case
It’s easier to install some parts into the case before the motherboard goes in.
- Install Motherboard Standoffs: Your case should come with small brass standoffs. Screw these into the case’s motherboard tray in the locations that correspond to the mounting holes on your motherboard. This prevents the motherboard from shorting out against the metal case.
- Install the I/O Shield: The I/O shield is a thin metal plate that frames the ports on the back of your motherboard. Snap it into the rectangular cutout on the back of your case from the inside.
Step 3: Install the Motherboard
Carefully lower the motherboard into the case, aligning its mounting holes with the standoffs you just installed. Ensure the ports on the back of the motherboard fit correctly into the I/O shield. Secure the motherboard to the standoffs using the provided screws.
Step 4: Install the Graphics Card
Locate the topmost PCIe x16 slot on your motherboard—this is the long slot closest to the CPU. Remove the corresponding expansion slot covers from the back of your case. Open the retention clip on the PCIe slot, align the GPU’s connector with the slot, and press it firmly into place until the clip clicks shut. Secure the GPU to the case with screws.
Step 5: Install Storage Drives and Power Supply
- Install SSDs/HDDs: Mount your 2.5-inch or 3.5-inch drives into the drive bays or cages provided in your case. Secure them with screws.
- Install the PSU: Slide the power supply into its designated spot at the bottom or top of the case. Secure it to the back of the case with the four screws that came with it.
Step 6: Connect All the Cables
This is often the most intimidating part, but it’s just a matter of matching plugs to sockets.
- Main Power: Connect the large 24-pin motherboard connector and the 8-pin CPU power connector from the PSU to the motherboard.
- GPU Power: If your graphics card requires extra power, connect the 6-pin or 8-pin PCIe power cables from the PSU to the GPU.
- Storage Power: Connect SATA power cables from your PSU to your SSDs and HDDs.
- Data Cables: Connect your drives to the motherboard using SATA data cables.
- Front Panel Connectors: This is the trickiest part. Connect the small cables from the case’s front panel (power button, reset button, USB ports, audio jacks, and LED lights) to the corresponding pins on the motherboard. Refer to your motherboard manual for the pin layout.
Once everything is connected, use zip ties to bundle loose cables together and route them behind the motherboard tray for better airflow and a cleaner look.
First Boot and Troubleshooting
With the case panel still off, plug in your power cord, monitor, keyboard, and mouse. Press the power button. If everything was done correctly, the fans will spin, lights will turn on, and you will see a message on your monitor. This screen is the BIOS/UEFI, your motherboard’s basic software.
If the PC doesn’t turn on or show anything on the screen, don’t panic. This is a common part of the process.
- No Power at All: Check that the PSU is switched on (the switch on the back) and all power cables (24-pin, 8-pin CPU) are fully seated. Ensure the front panel power button is connected to the correct pins.
- Powers On but No Display: A common culprit is the RAM. Make sure the sticks are fully seated in their slots—you should hear a click. Reseat the graphics card and check that its power cables are connected. Also, ensure your monitor is plugged into the GPU, not the motherboard’s video output.
- System Crashes or Freezes: This could be an overheating issue. Check that your CPU cooler fan is spinning. You may need to re-apply thermal paste and re-seat the cooler.
After a successful first boot, you can proceed to install your operating system (like Windows or Linux) from a USB drive.
A Rewarding Journey
Building a custom PC is more than just assembling hardware; it’s an investment in a machine that is truly yours. You gain an invaluable skill, a deeper appreciation for technology, and a computer that perfectly suits your needs and budget. The sense of accomplishment you’ll feel when you press the power button and your creation comes to life is unmatched. Now that you have the knowledge, it’s time to start planning your build and join the millions who have discovered the joy of building their own PC.
Please visit website for more info.